Hardware Ethernet Filter (USU ECE 3710)
This project from December 2015 was originally hosted on USU Spaces, which has since been retired. This page simply preserves the original documentation and artifacts.
Overview
This project was designed and completed by:
- John Call - [email protected]
- Landon Wilcox - [email protected]
Feel free to email us with questions about our project.
The applications of internet filtering are widespread; examples include: parental controls, ad-blocking, and cyber security. A hardware solution allows for one device to protect an entire network, where most existing software solutions will only protect one computer (and have significant limitations in regard to parental controls).
In our project, we filtered against only 1 website: bing.com. Over the course of the project, we experimented with different methods of filtering data. In the end we decided to filter based on if a packet’s destination IP matched the known IP of bing’s server.
For a demonstration, see https://youtu.be/A96wC7NZhdE
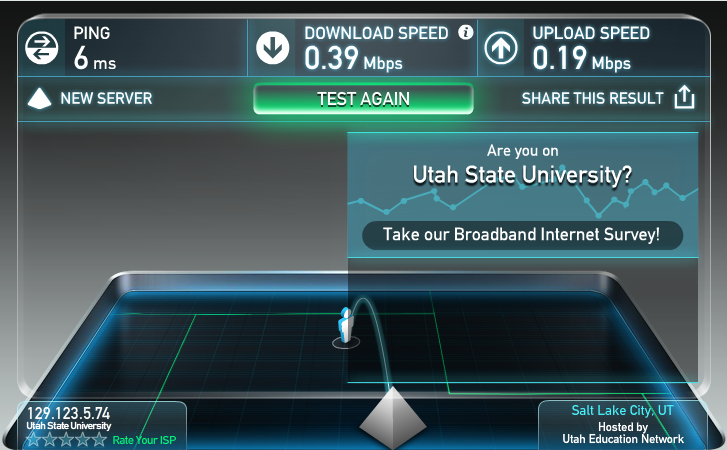
Below are speed test results showing the ramifications of using our filter.
| Direct Connection Speed Test | Speed Test with Filter Disabled | Speed Test with Filter Enabled |
|---|---|---|
 |
 |
 |
There is high variability in the speed of using our device. This is because packets are only transferred 1 at time, resulting in an internet speed that is bottle-necked by the speed of our SPI communication with the WIz550io (ethernet) chips. As such, considering many programs are running on my laptop that use the internet, a program being silent during a test and active in another can account for why the test proved faster with the filter disabled.
What should be noted is that the filtration process itself achieves O(1), causing no noticeable difference between having the filter enabled or disabled. Methods to increase the speed of SPI communication between the Wiz550io chips we use and the processing speed of the microcontroller would be the best course of study to increase the the bottle-necked speed closer to the direct connection.
Required Parts
- 1 Tiva-C TM4C123G Launchpad
- 1 ER-TFTM032 LCD/Touchscreen Module
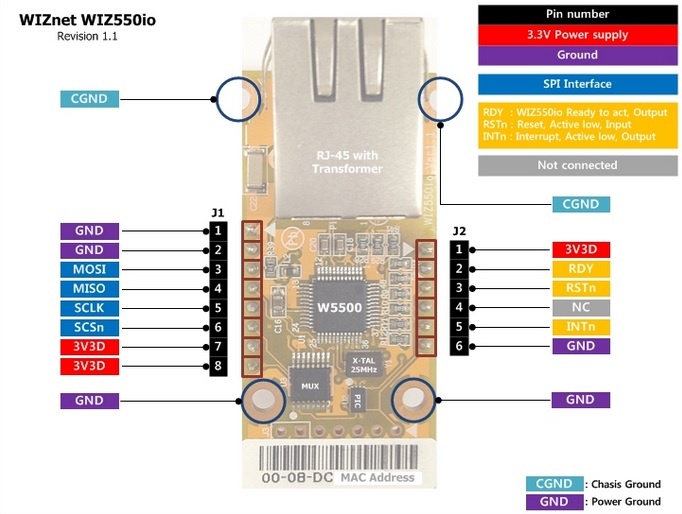
- 2 Wiz550io modules
- An external 3.3V source (sources up to 350mA)
- A router with internet access
- A laptop/desktop with an Ethernet port
- Two (non-crossover) Ethernet cables
- Wireshark (software) may prove useful
External Resources
- Wiz550io Home Page
- Wiz550io Wiki
- W5500 DataSheet
- Microcontroller DataSheet
- Tiva Launchpad DataSheet
- LCD, Touchscreen, and TFT-Module Datasheets
- Wireshark Download Page
Our Project Design Documents
- Initial Proposal
- Design Document
- Source Code (include the following:)
- Final Project
- main.c
- enet.c
- filter.c
- Shared
- fonts.c
- LCD.c
- SPI.c
- Final Project
Connecting Everything
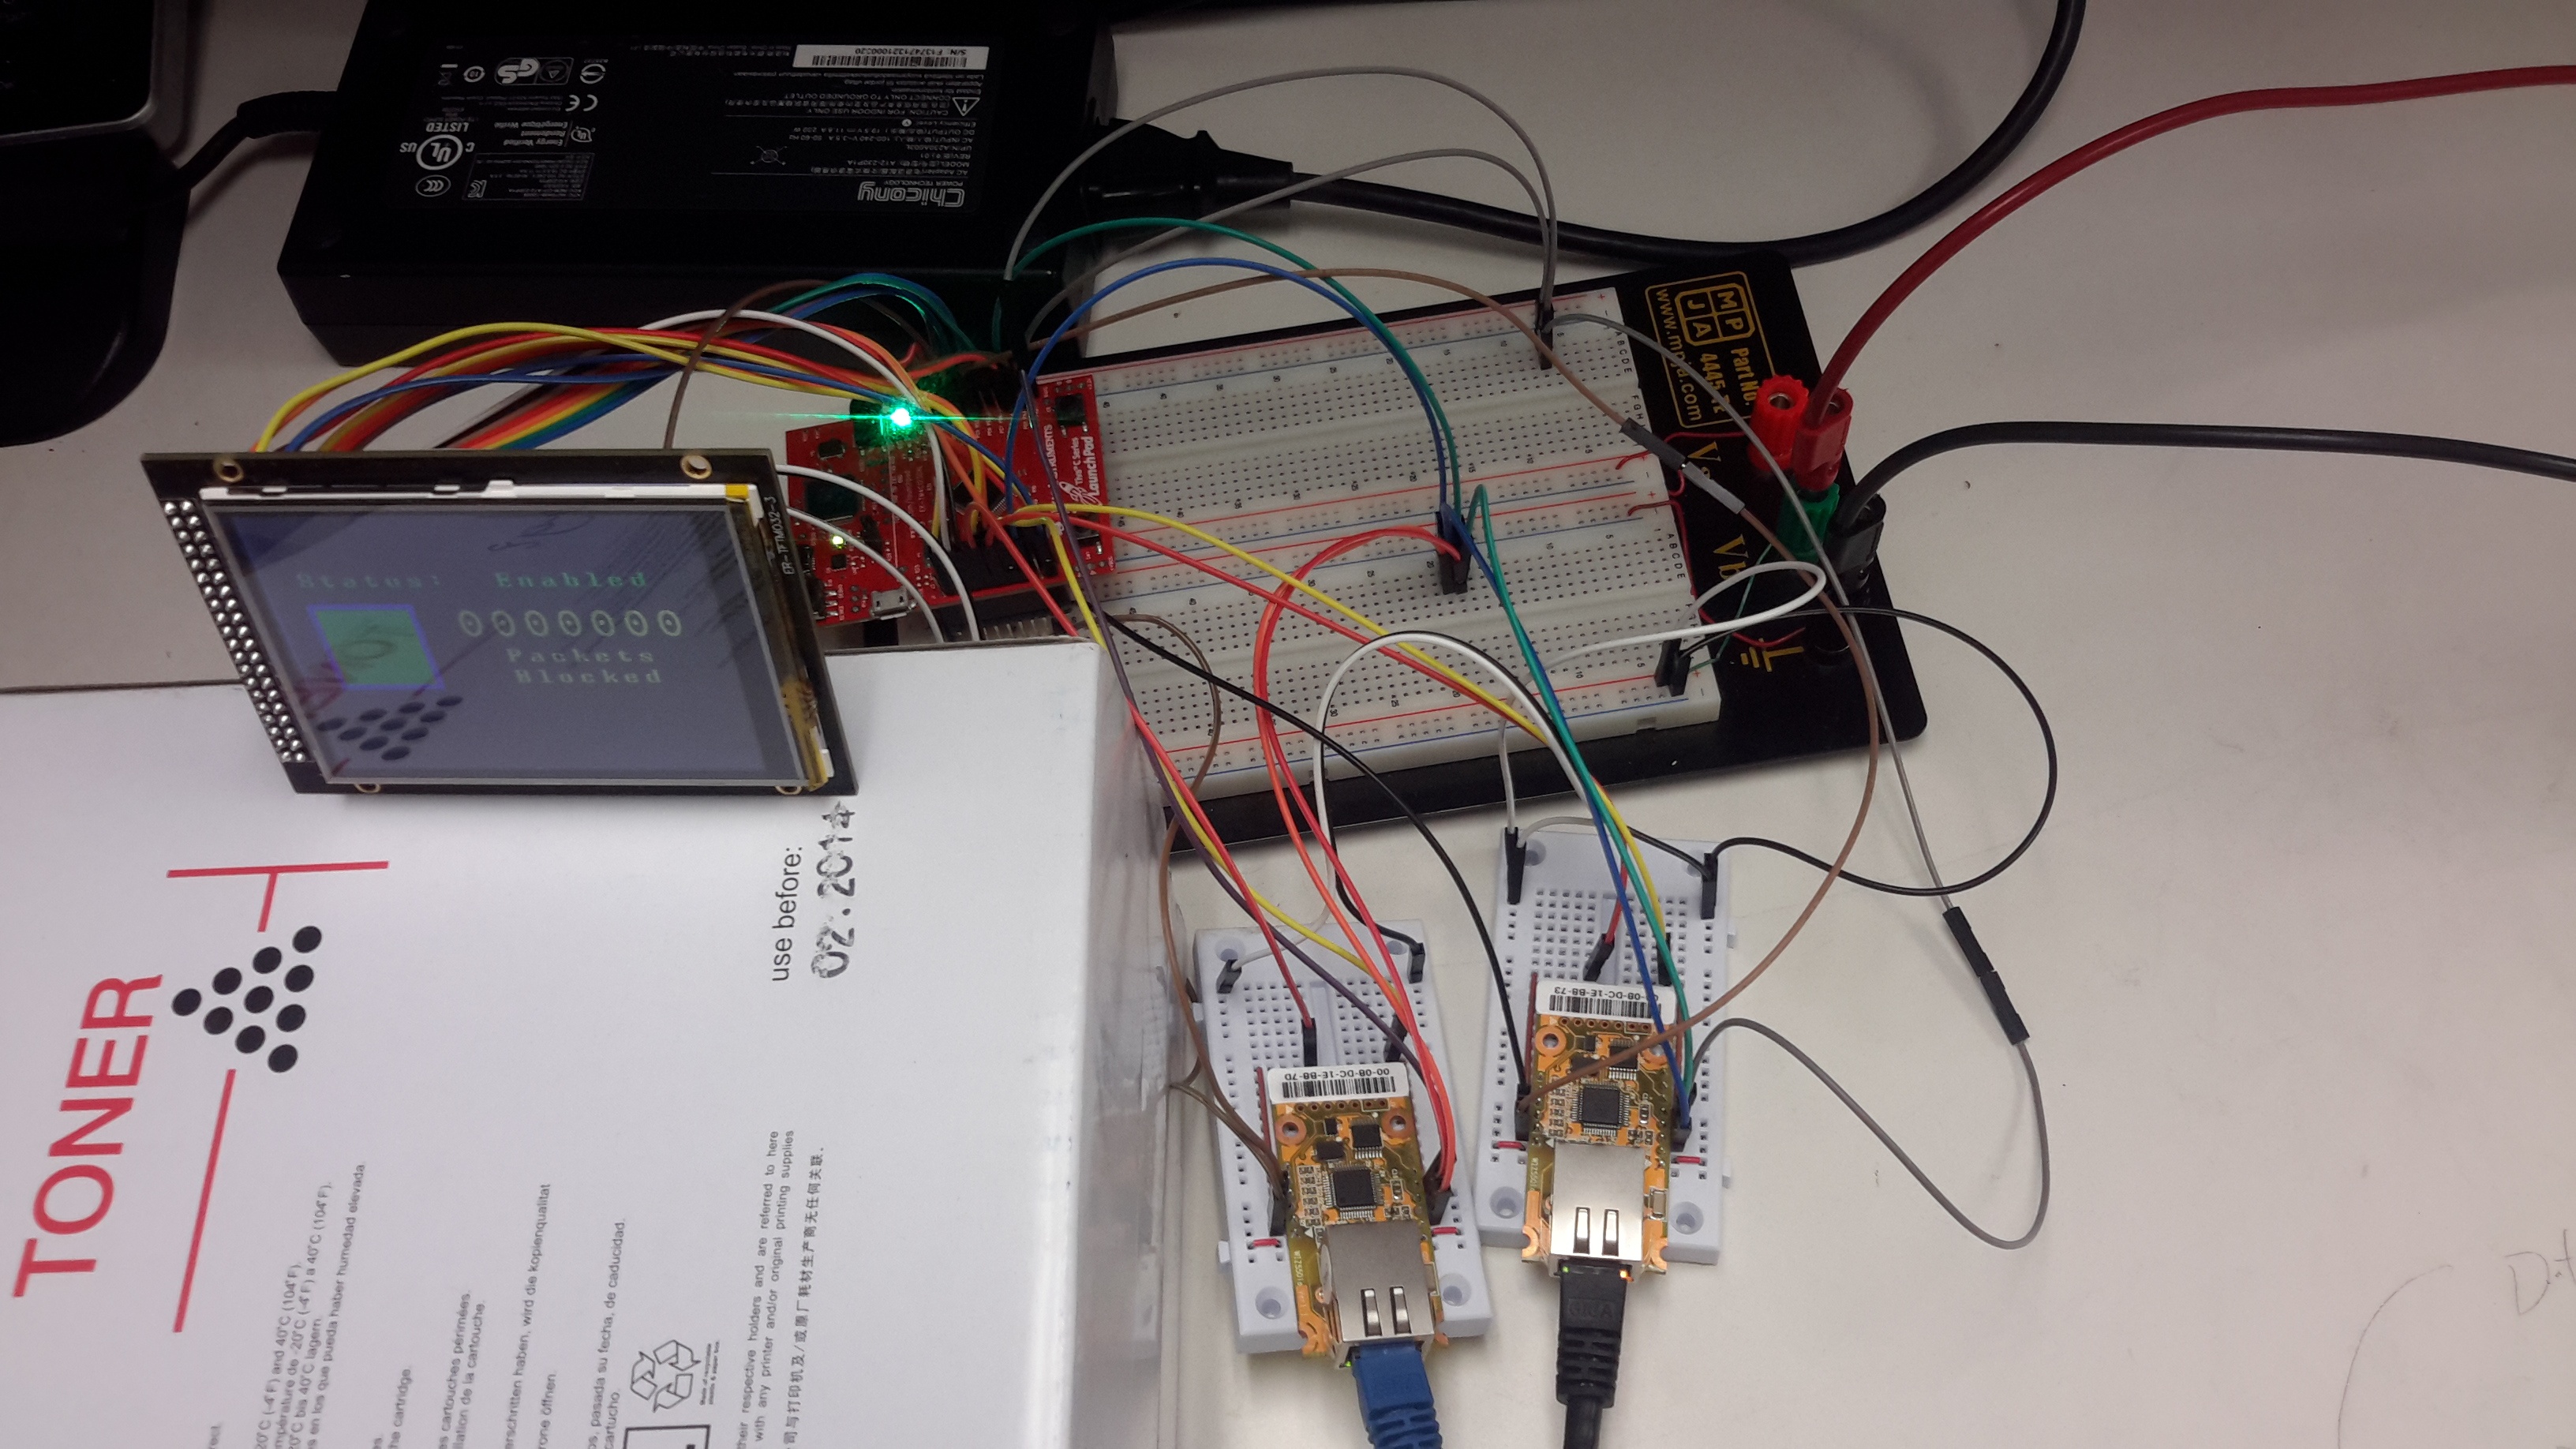
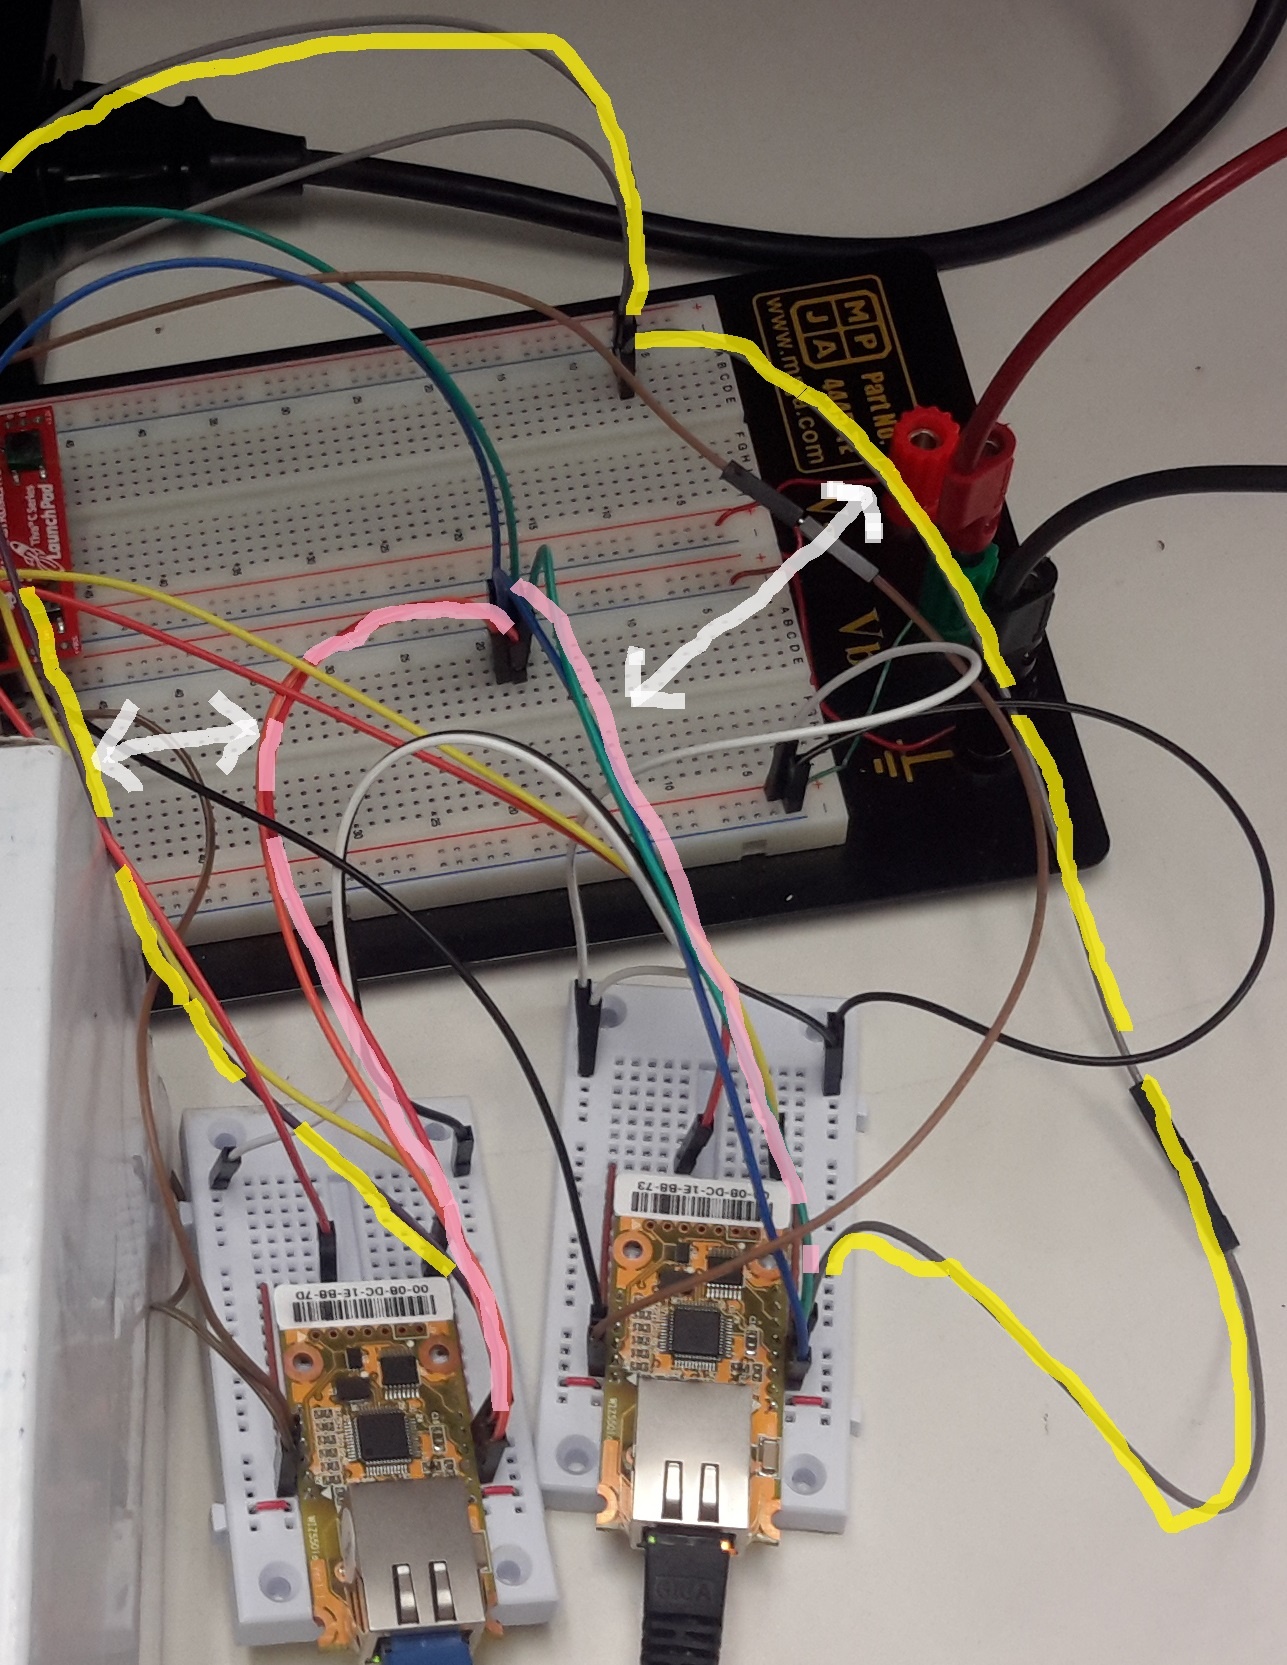
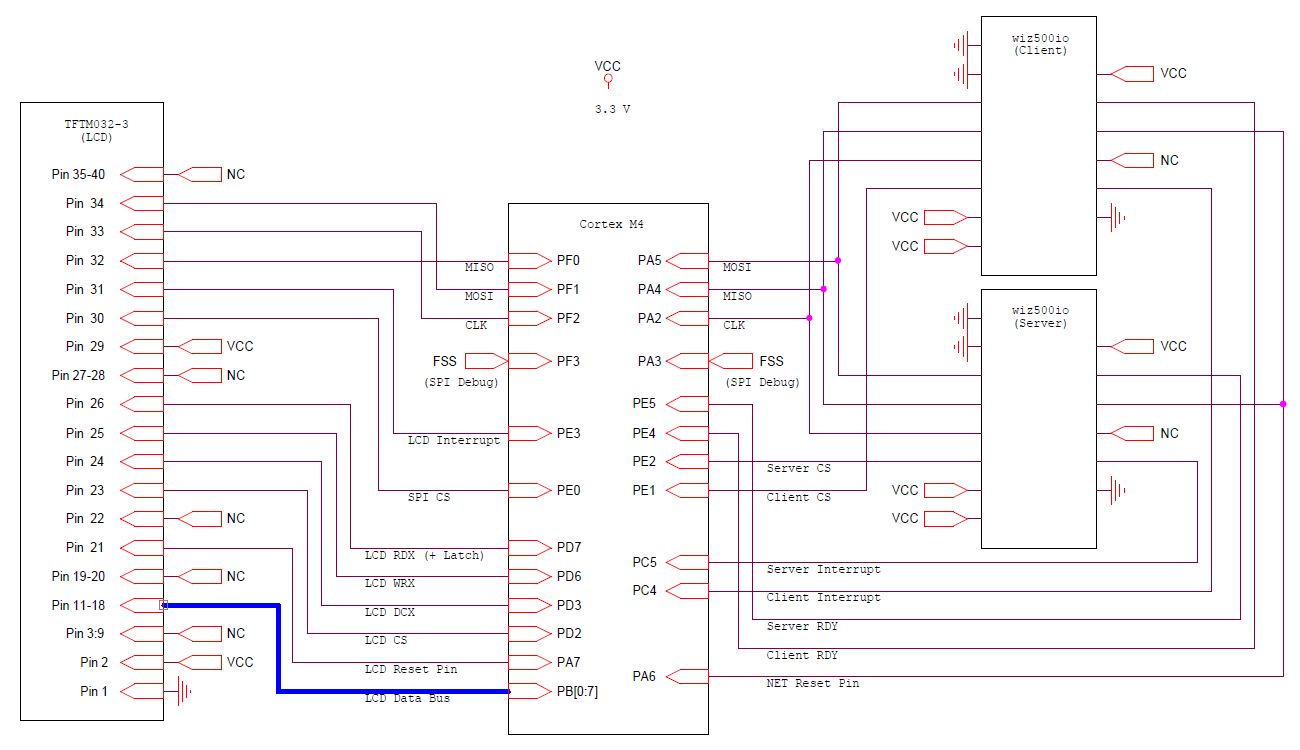
To the right are the schematics of how our microcontroller is configured to interface with the 3 peripherals. Something to note when wiring: we noticed that electromagnetic interference was still a problem even with only two devices sharing the same SPI module if the clock wire was too close to the data wire. Length of wire, or other factors we were not fully able to understand may be influences in that regard. In any case, if you have issues, try distancing the clock wires from MOSI/MISO.
Note the distance between the yellow (clock) and pink (MOSI/MISO) wires below. Without this, SPI communication errors result. See the Final Report for more details.
Obtaining IP Information
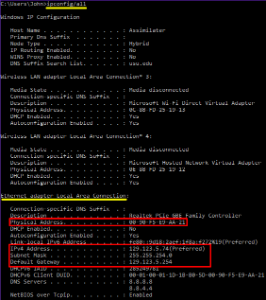
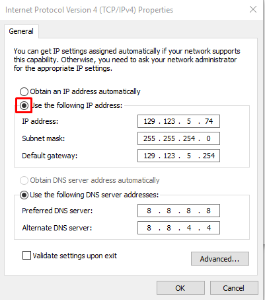
Part of the project requires hard coding ip configuration (found at the beginning of enet.c). To determine what information you should use, use ipconfig (Windows) or ifconfig (linux). Additionally to determine the physical address of the router you are normally attached to, wireshark may prove useful.
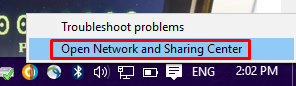
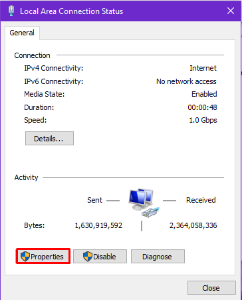
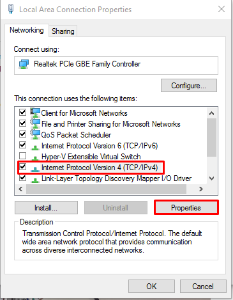
The screen captures below will walk someone who is unfamiliar with internet configuration through the process, on Windows, of finding your ip configuration, and changing your adapter to use a static ip (which this project needs to function as it currently is; future improvements would include handling dynamic ip resolution with DHCP packets). Also, DNS servers are a part of DHCP resolution so you will have to select your own. In the screen capture you can see I used googles DNS servers (8.8.8.8 and 8.8.4.4)
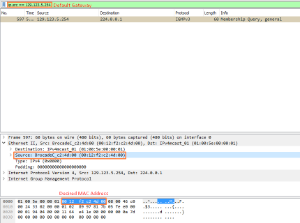
The last screen capture demonstrates how the physical address of the router you are connected to can be obtained from a wireshark capture searching for the ip address of the default gateway.